

Building a pole barn is one of the most satisfying projects you can take on — whether you’re creating a storage space, workshop, or even a barndominium. The concept seems simple: set posts, add trusses, and wrap the structure in siding. But as many first-time builders eventually learn, there’s a big difference between getting it built and getting it right.
The good news? Most common pole barn mistakes are easy to avoid once you know what to look for. Let’s go through the errors first-time builders often regret and how to sidestep them from the start.
Ignoring Site Preparation
Many beginners underestimate how much groundwork matters — literally. Before a single post goes in, your site should be leveled, properly drained, and cleared of organic materials like roots or stumps.
A poorly prepared site causes several long-term issues:
- Water pooling or flooding around the barn foundation.
- Uneven settling can warp doors and compromise framing.
- Moisture problems that lead to rot or corrosion.
Tip: Grade your site so water runs away from the structure, not toward it. If you’re unsure where to start, hire a local excavation contractor to ensure proper compaction and a stable slope.
Choosing the Wrong Location
Location mistakes can haunt you for years. A pole barn placed too close to trees, property lines, or power lines can restrict access and limit future expansion.
Be sure to:
- Check local building codes and required setbacks.
- Factor in sunlight and prevailing wind direction (important for barns used as workshops or animal shelters).
- Plan for driveways and vehicle access, especially if you’ll be using heavy equipment.
Visualize your property five to ten years ahead — future you will thank you.
Skimping on the Foundation and Posts
The posts are the backbone of a pole barn. Cut corners here, and you risk structural failure. First-timers often choose the cheapest materials or skip proper anchoring to save money, but that decision can lead to shifting or leaning structures.
Best practices include:
- Use pressure-treated posts rated for ground contact.
- Embedding posts below the frost line to prevent heaving.
- Setting posts in concrete sleeves or gravel for better drainage.
A stable foundation doesn’t just protect against wind and shifting soils — it ensures doors stay square and your barn lasts for decades.
Forgetting to Insulate and Seal Properly
Insulation is often treated as an afterthought — but it’s one of the biggest regrets first-time builders cite. Even if your barn is meant for storage, insulation reduces condensation, stabilizes temperatures, and prevents corrosion of metal panels.
Neglecting to add a vapor barrier or proper insulation leads to:
- Dripping condensation inside the barn during humid weather.
- Mold or mildew buildup on ceilings or walls.
- Energy inefficiency, especially if you heat or cool the space later.
Investing in quality materials, such as CMI Insulation’s pole barn insulation products, helps maintain comfort and longevity without breaking your budget. It’s far easier to insulate during the build than retrofit later.
Poor Ventilation Planning
A well-insulated pole barn still needs air movement. Without ventilation, moisture and heat accumulate, creating a breeding ground for rust and condensation. For most barns, a combination of ridge vents (for hot-air escape) and eave or gable vents (for cool-air intake) works best. This natural airflow protects your roof and keeps humidity levels stable year-round. If you plan to house animals, installing circulation fans will also prevent ammonia buildup and improve air quality.
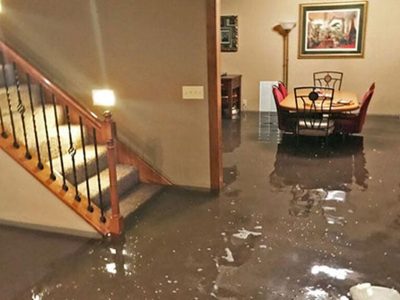
Overlooking Drainage Around the Perimeter
Water is the silent enemy of any post-frame structure. Even a well-built barn will suffer if stormwater collects around its base.
To prevent moisture intrusion:
- Grade the soil to slope away from the barn.
- Extend downspouts at least 6–10 feet from the foundation.
- Add gutters or a French drain if your site sits low or receives heavy rainfall.
Proper drainage not only protects your posts but also keeps the interior floor dry and stable — essential if you use the space for tools, vehicles, or livestock.
Underestimating Build Time and Material Needs
It’s easy to fall into the “weekend project” mindset. First-time builders often underestimate how long pole barns actually take to complete — especially factoring in weather delays, delivery schedules, and site prep.
Avoid frustration by:
- Creating a realistic timeline with milestones for framing, roofing, and finishing.
- Adding 20% contingency time for unforeseen issues.
- Ordering materials early to prevent shortages mid-build.
Remember, rushing construction often leads to cutting corners that cost more to fix later.
Not Planning for Future Use
Your barn’s purpose can evolve — today it’s a storage building, tomorrow a hobby workshop or guest suite. Many regret not wiring for utilities or planning for insulation and interior finishes early on.
Think long-term:
- Run conduit and plumbing sleeves even if you don’t need them yet.
- Choose a roof pitch and spacing that can accommodate additional insulation or drywall later.
- Leave flexible design options to adapt as your needs grow.
Building a pole barn the right way is about smart planning, not just strong materials. By focusing on a stable foundation, good insulation, proper ventilation, and future flexibility, you’ll create a structure that performs as well as it looks. Avoid these common missteps, and you’ll save time, money, and years of frustration — ending up with a barn that’s not just built, but built to last.


Comments